
For the past couple of weeks, I have been working on the Hall of Mirrors scene from the 1941 film, “Citizen Kane.” To get the finalized look, it took multiple steps, as listed below:

Step 1. Find reference images
Fortunately, I found the clip of the scene of Kane walking down the hall with multiple views of the exact archway I was recreating. With these screenshots, I was able to create a collage that I would reference every time I worked on the project. The clip itself is also important because it helps me establish the lighting setup too, especially as Kane moves across the hallway.
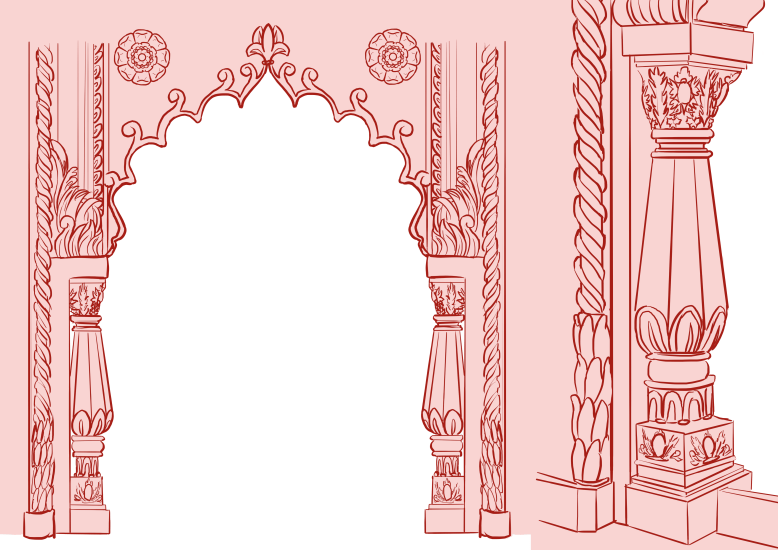
Step 2. Draw a modeling reference sheet to clarify details
Seeing the reference images are fairly grainy and some of the smaller details get lost in the noise of the film, I wanted to create my own reference sheet for ease of modeling. Since this is a very intricate hallway with many miniature details, I traced over the reference images, clarifying some of the smaller models.


Step 3. Take pictures and photoshop the column in with the wall to get the environment
Walking around campus, I had difficulty finding any pillars that were apart of or up against a wall. But fortunately I found an interior pillar, albeit in a round room, and got the snapshot with the angle I needed. As for the wall, my house fit pretty well with the scenery; the hallway I did plan on using as a reference picture ended up being too thin of a walkway compared to the big room in the reference image, so I had to push the couch back and get a shot of the bar. After getting the two pictures, I photoshopped them together to fit the scene.


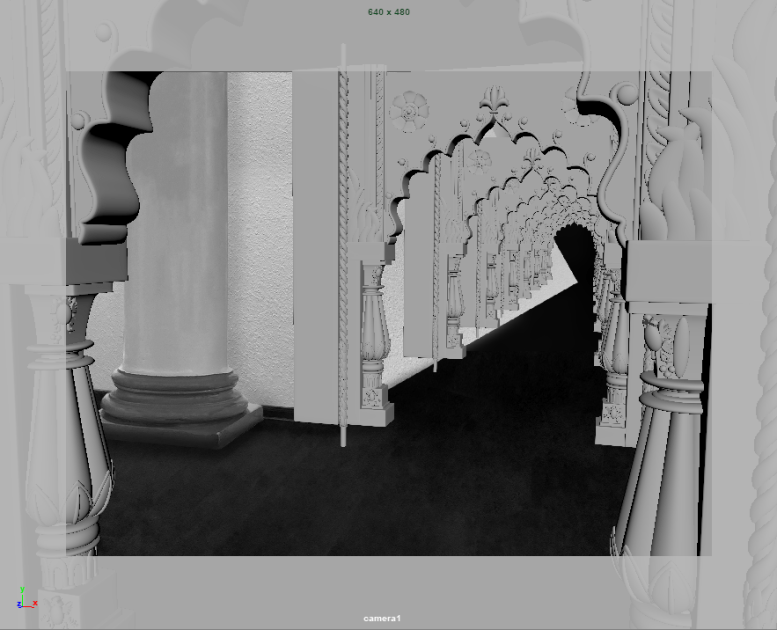
Step 4. Block out the archway
Of course, any important step to modeling is to first block it out to make sure the proportions are correct. I first started off with polygons purely for blocking the scene out and later replaced them with NURBS surfaces. The images up above was the point where I had the NURBS surfaces blocked in and was starting to add in detail, especially on the archway—arguably the focal point of the piece.
Note that at this point I was just now getting used to using NURBS. Since the NURBS primitives were, well… primitive, I ended up having to conduct some work-around ways to create basic geometry. For example, to create a “cube” I created multiple curves that were square-like (with slightly rounded edges), and lofted them together; of course, this still needed its control vertexes tweaked, but it was the best way I figured out how to make a decent rectangular prism, as seen at the bottom of the column above. The only issue with this process was that there would be a small gap at the top and bottom of the prism, but those faces would be covered within the archway so it was not a concern.
Step 5. Line up the perspective
This step is much more difficult than it looks. In Maya I pulled up image planes for both the Citizen Kane and my photoshop picture. After awhile of internal conflict between lining my scene with the original reference image versus the slightly-off photo, I ended up lining the image up with my photograph so the standalone image would have the correct perspective.


Step 6. Finish Modeling
Continuing on with modeling, for the archway I extruded a NURBS circle across the created path. And using that same curve, I also used planar on it, so the wall would fill in the creases archway easily. Then lastly I only used the revolve tool for the fat column’s top and bottoms to get a smooth edge on them. Most of the detail within the scene is a mixture between the planar and loft tools and manipulating sphere control vertices.


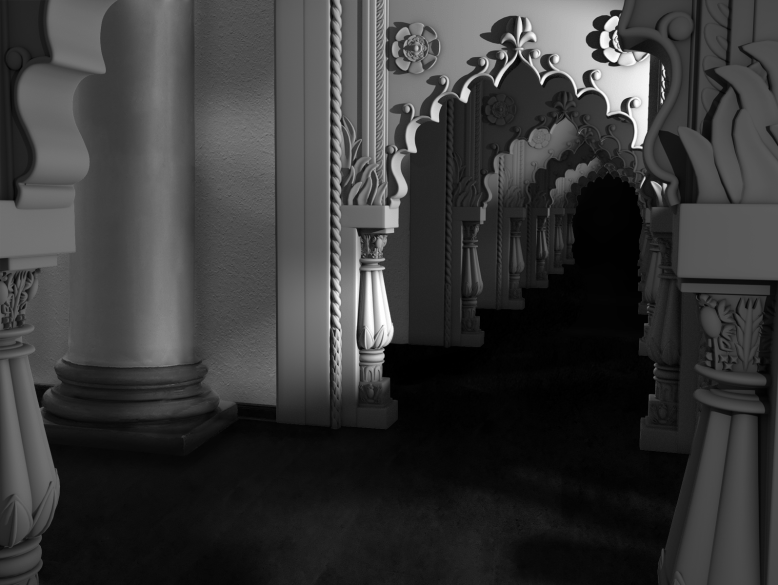
Step 7. Lighting & Rendering
Like modeling, it is important to block lighting in to set the mood of a scene. I started with a first pass, found the render to be too dark, and kept fixing the first area till I got to a good point. I got some critique from a friend and polished it up some more. Once the front room was finished, I went to light the back rooms, alternating the lighting like the mirrors in the original image.
Step 8. Compositing
After getting the render and ambient occlusion pass, I imported those into photoshop to composite; unfortunately the shadow pass was not working, so I had to hand-draw in the shadows for the photo. All in all, this is what I have and I learned a lot about modeling and replicating movie stills from the experience.